◀
Setup oidc-agent
oidc-agent is a set of tools to manage OpenID Connect tokens and make them easily usable from the command line. We followed the ssh-agent design, so users can handle OIDC tokens in a similiar way as they do with ssh keys.
Admin and user guides are available here
Installation
1 2 3 4 | wget https://github.com/indigo-dc/oidc-agent/releases/download/v3.2.7/oidc-agent-3.2.7-1.el7.x86_64.rpm sudo yum install libmicrohttpd libsodium sudo rpm -i oidc-agent-3.2.7-1.el7.x86_64.rpm oidc-agent --version |
Edit your .bashrc to make oidc-agent persistent, adding the following line:
1 | test -e ~/.oidc-agent.env && . ~/.oidc-agent.env |
Then run the agent as follows:
1 | oidc-agent > ~/.oidc-agent.env |
and load the environment again:
1 | source ~/.bashrc
|
Account Configuration
Attention
You need to have a valid account in DODAS IAM to proceed with the configuration.
oidc-gen is used to generate new account configurations.
Account configurations are identified by a shortname. This shortname can be set to anything, but it is recommended to use a descriptive name of the provider / account used. E.g. dodas
Run the following command:
1 | oidc-gen --flow device dodas |
You will get the following output:
1 2 3 4 5 6 7 8 9 10 11 12 13 14 15 16 | [1] https://iam-test.indigo-datacloud.eu/ [2] https://iam.deep-hybrid-datacloud.eu/ [3] https://iam.extreme-datacloud.eu/ [4] https://iam-demo.cloud.cnaf.infn.it/ [5] https://b2access.eudat.eu/oauth2/ [6] https://b2access-integration.fz-juelich.de/oauth2 [7] https://unity.eudat-aai.fz-juelich.de/oauth2/ [8] https://unity.helmholtz-data-federation.de/oauth2/ [9] https://login.helmholtz-data-federation.de/oauth2/ [10] https://services.humanbrainproject.eu/oidc/ [11] https://accounts.google.com/ [12] https://aai.egi.eu/oidc/ [13] https://aai-dev.egi.eu/oidc [14] https://login.elixir-czech.org/oidc/ [15] https://oidc.scc.kit.edu/auth/realms/kit/ Issuer [https://iam-test.indigo-datacloud.eu/]: |
https://dodas-iam.cloud.cnaf.infn.it/
Warning
The trailing / in the issuer is very important! Don't forget it.
Then you will asked for the following:
1 2 | This issuer supports the following scopes: openid profile email address phone offline_access Space delimited list of scopes or 'max' [openid profile offline_access]: |
You can just type ENTER since the suggested scopes are sufficient for our purposes.
After that, you will get the following output:
1 2 3 4 5 6 7 8 | Registering Client ... Generating account configuration ... accepted Using a browser on another device, visit: https://dodas-iam.cloud.cnaf.infn.it/device And enter the code: UU2F47 |
As suggested, open your browser and follow the link, then enter the code.
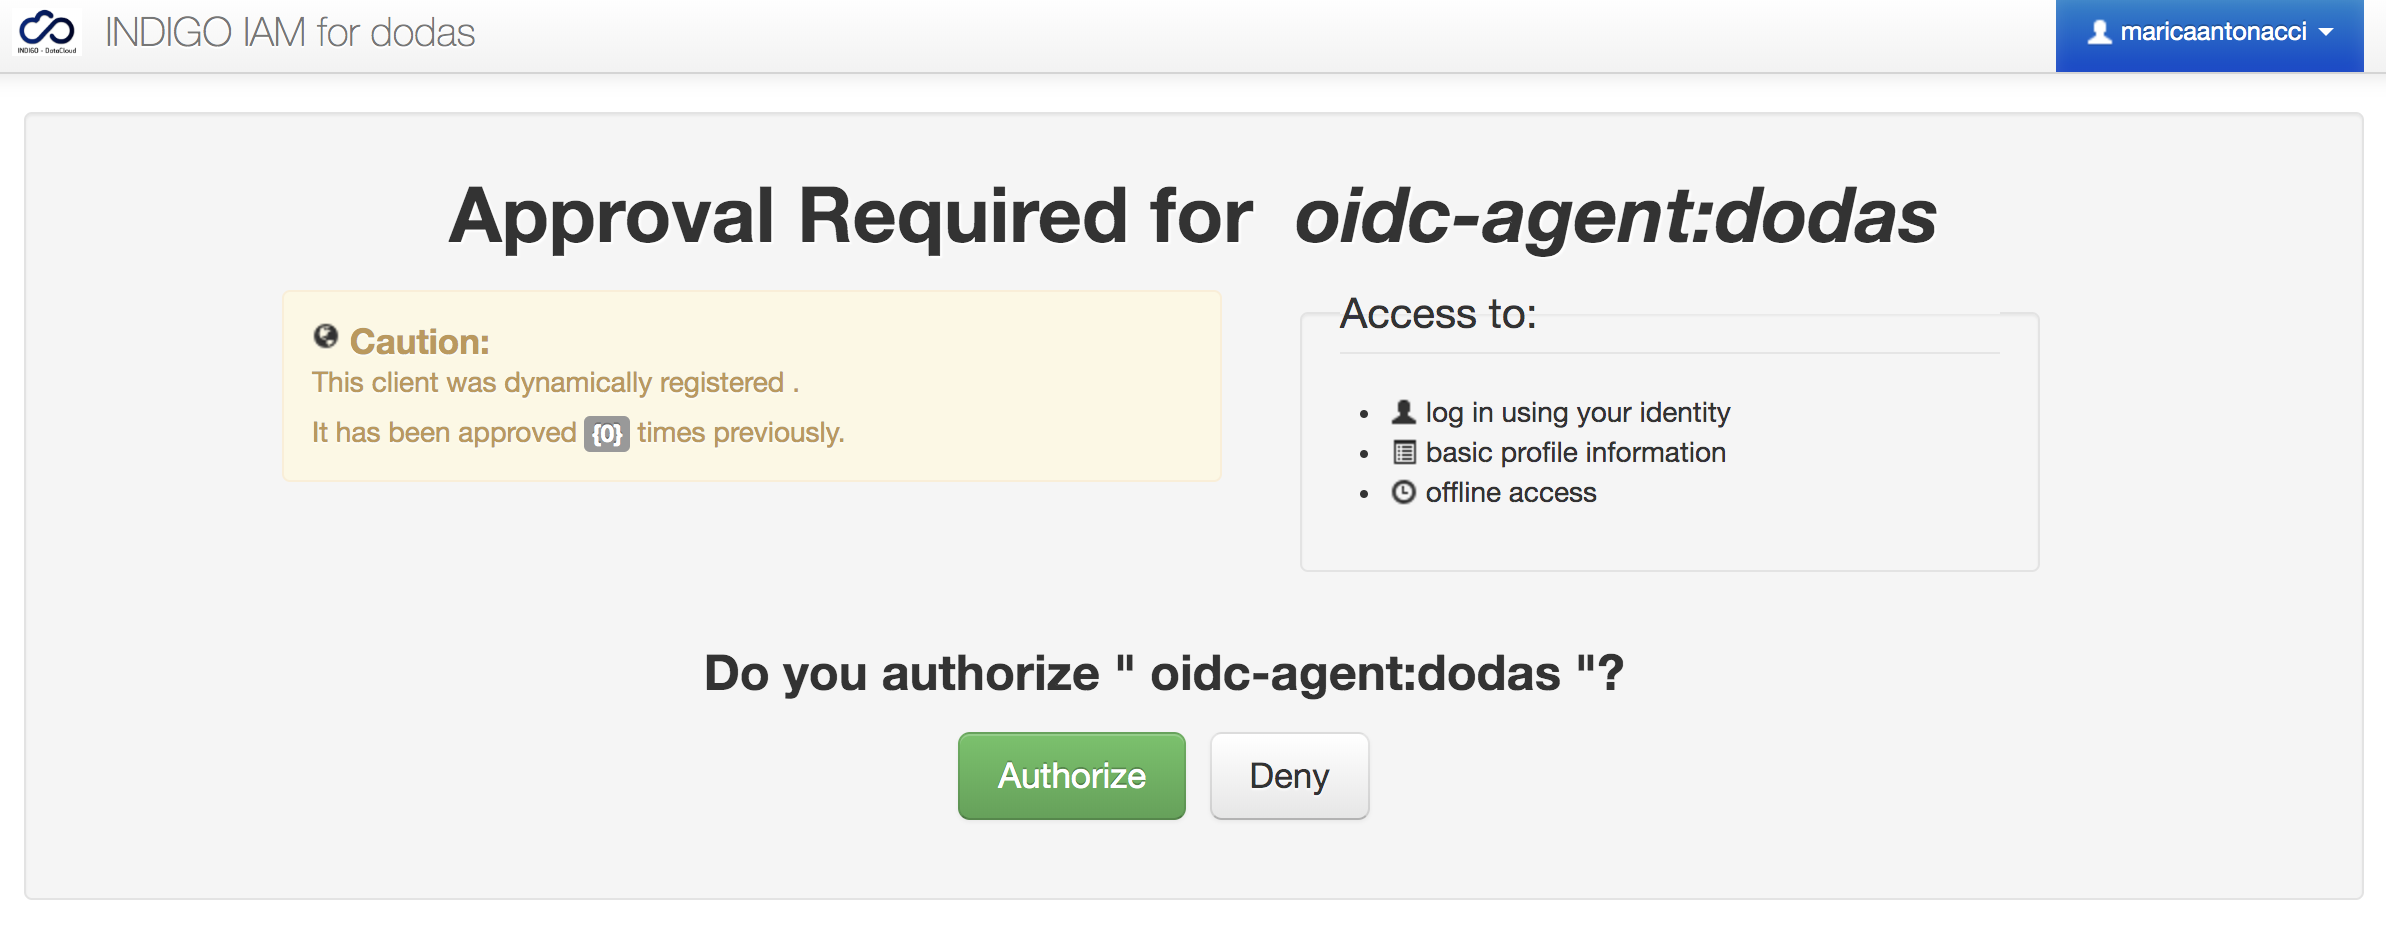
You will be asked to approve the registered client as shown in the image below.
After your approval, the oidc_gen command will automatically move to the next step allowing you to set an optional password for configuration encryption:
1 2 | Enter encryption password for account configuration 'dodas': Confirm encryption Password: |
Test the configuration
In order to verify the correct setup, try to get a token using the oidc-token command:
1 | oidc-token dodas |
If everything is working fine you will get your token in the command output. E.g.:
1 2 | $ oidc-token dodas eyJraWQiOiJyc2ExIiwiYWxnIjoiUlMyNTYifQ.eyJzdWIiOiIyMzc0MzI5NC1jODg0LTQyMTAtYjAzMy05MGFkNWFhMTcwZDgiLCJpc3MiOiJodHRwczpcL1wvZG9kYXMtaWFtLmNsb3VkLmNuYWYuaW5mbi5pdFwvIiwiZXhwIjoxNTc0MzUyMDY3LCJpYXQiOjE1NzQzNDg0NjcsImp0aSI6ImNmZTcxNTVkLTNlNWMtNDNiNy04MDZiLTM2MTVhZTJmNWJlYSJ9.B9WovoH0dnuOqoLKlOCcSzrshTpADzdtAf_J_kapPGpj4eI_TkKVk-r_trefPACv_fI656UukCcK5aJtv4_vn6iiAy2x0nCy6lwNNhCJcYJHmn2n-XaqeT6-YM9tyMFjKFusXMLVIoGAQAt_RlfivX8kpNXAmEsEUgOTwHPp9yc |